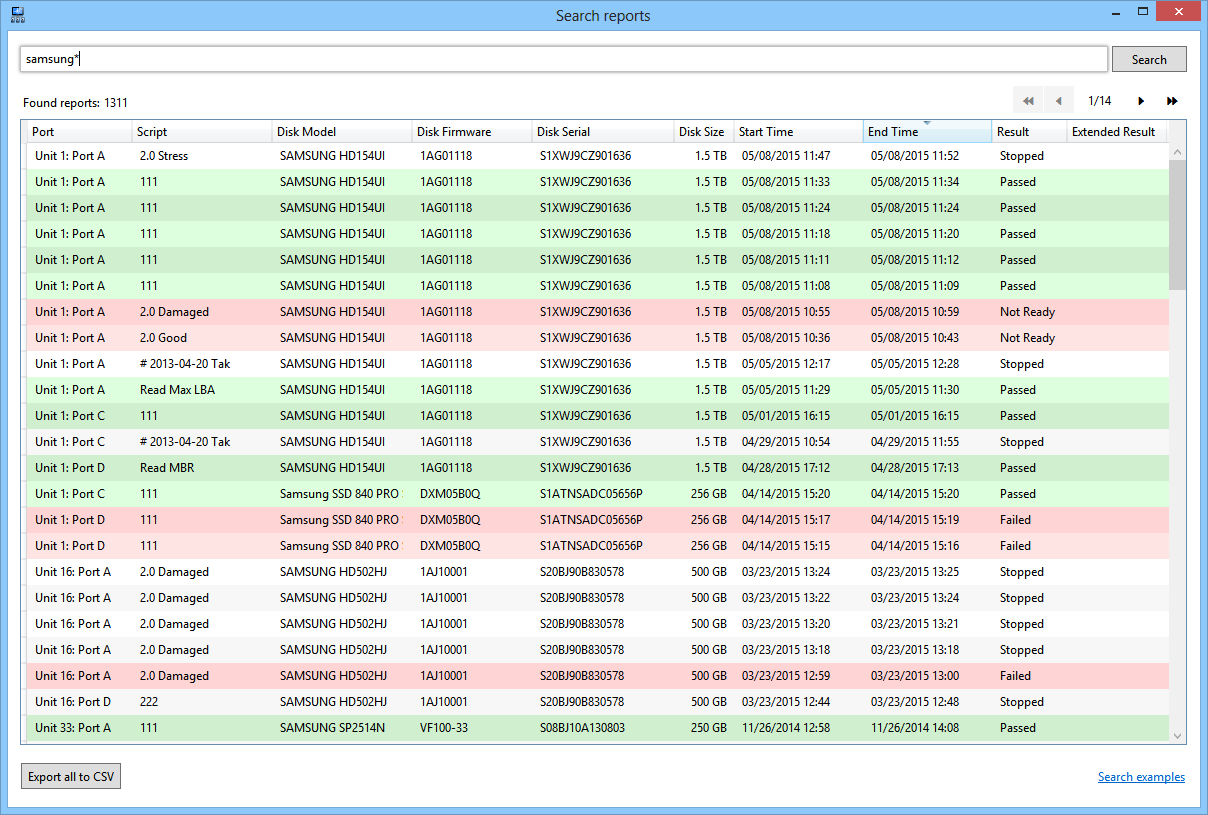
Today we are releasing Atola Insight Forensic 4.6.
The killer feature is AtolaScript language and the script execution engine. Now Atola Insight empowers you to perform the most sophisticated tasks by combining over 50 commands the way you want. Those include custom ATA commands, various commands to scan throughout the entire media to find specific data, read/write tests, and many others.
Full Atola Insight Forensic 4.6 change log is available here: Changelog.
Scripting
AtolaScript language is probably the simplest one you have ever seen. Scripts consist of one line instructions without semicolons. Conditions (if) as well as while, for, foreach loops are available in C# syntax. It is easy to run multiple scripts over different SATA, USB, SAS, IDE devices at the same time.
With all that being mentioned, the best thing about scripting is a wide variety of simple yet powerful commands designed by Atola team.
Custom ATA commands
Atola Insight Forensic has just become the first forensic solution that enables to execute any ATA command for any SATA/IDE drive.
There are three AtolaScript commands to run custom ATA commands depending on necessity of data-transfer or its direction:
A few examples:
![Forensic scripts - Custom ATA commands]()
![Forensic scripts - Custom ATA commands]()
Remark: Built-in Source port write-protection rejects any custom ATA command that can modify device state (i.e. perform a write operation).
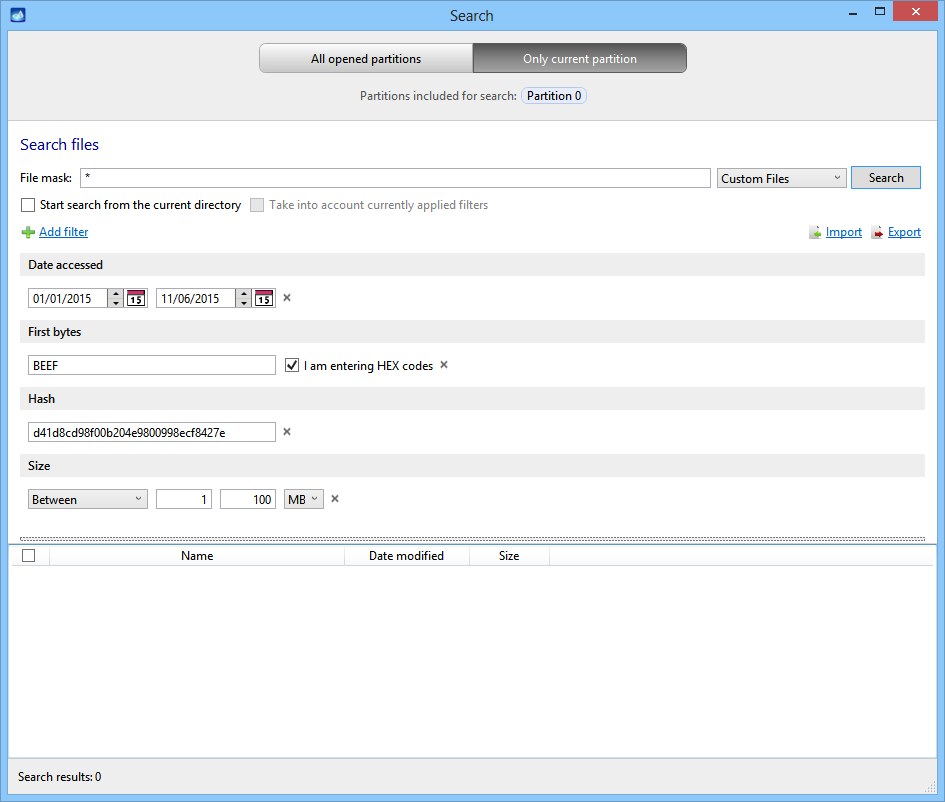
Ultimate pattern/word/phrase search
The scripting system includes an internal search engine which is based upon Intel Hyperscan, a high-performance multiple regex matching library. It enables you to run searches everywhere including unallocated space with the help of three commands:
The commands work for all SATA, USB, SAS, IDE devices plugged into the DiskSense system.
FindWords
The command performs a search of words or phrases over the whole media space or specified region. One the coolest FindWords features is that it attempts to match words/phrases in different encodings: ASCII, UTF-8, UTF-16LE, UTF-16BE. Now you can quickly perform a search in a multi-language environment.
In the example below you can see how FindWords outputs found matches for three words: Dubai, Quebec, Venice.
![Forensic keyword search in Atola Insight]()
FindHEX
We have also implemented FindHEX for high-performance HEX pattern search.
The screenshot shows us how amazingly simple is to look for BitLocker volumes:
![Forensic scripts - HEX search]()
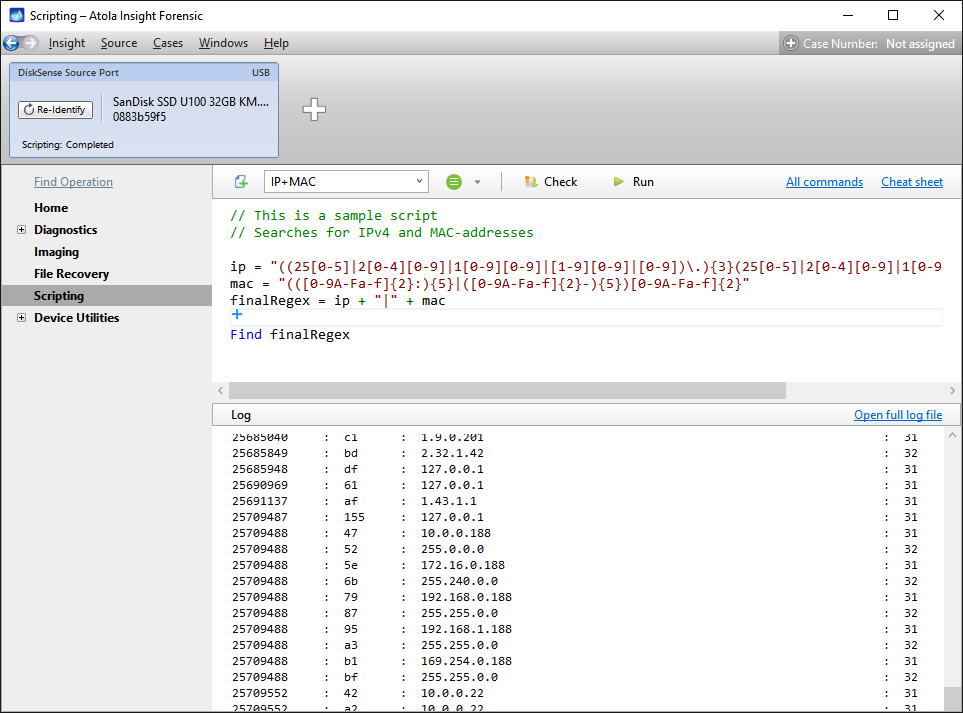
Find
Find is a powerful way to run a regular expression search over specified disk region. You can find absolutely everything using the command: emails, GPS coordinates, phone numbers, home addresses, IPs, credit card numbers and so forth.
![Forensic scripts - Find IP and MAC addresses via regex]()
Other handy AtolaScript commands
There are more than 50 commands available at your disposal. For instance, you can freely wipe, compare, hash drives or specific (or calculated) sector intervals.
Below I include a few more examples of what AtolaScript can do.
SMART attribute check
![Forensic scripts - analyzing SMART]()
Data entropy calculation
![Forensic scripts - Calculating entropy]()
Running benchmark test commands in parallel with scripts running on other devices
![Forensic scripts - Multi-tasking]()
Friendly AtolaScript editor
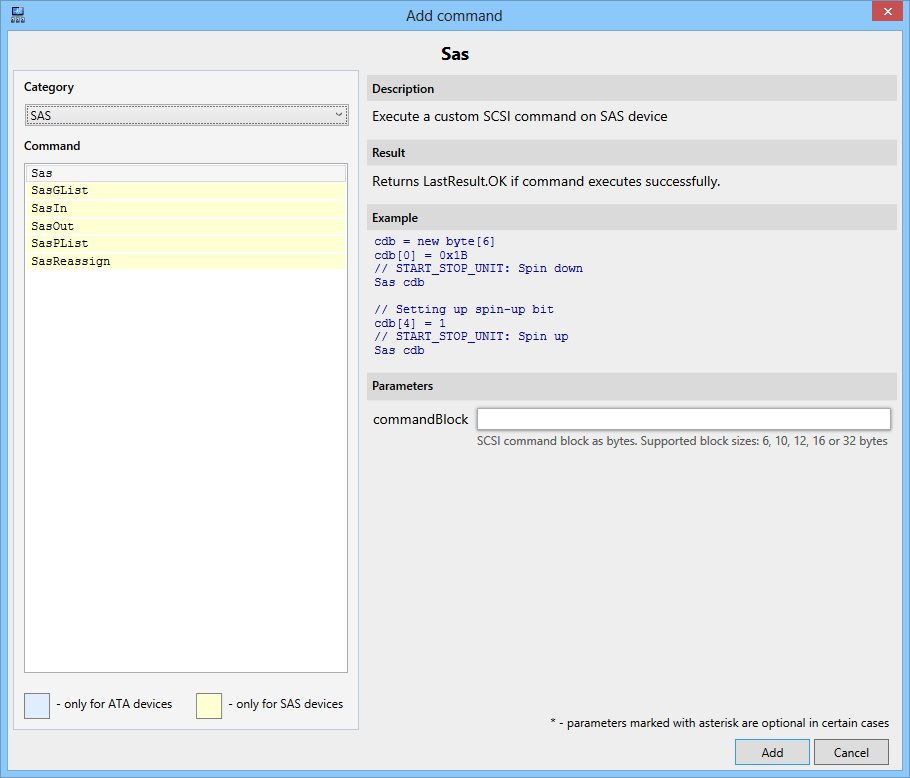
The editor comes with a number of helpful UI options to turn scripting into a pleasant experience. Wherever these signs show up:
![Plus]()
![Edit]()
one can click them and merely select a command looking at its description and sample code, and then edit command parameters with some additional help.
![Forensic scripting command panel]()
![Forensic scripting - Parameters panel]()
All other 4.6 changes are listed here: Atola Insight Forensic Changelog.
How to upgrade
Atola Insight Forensic 4.6 can be downloaded by all customers with an active software update subscription at no additional cost.
Where to buy
If you still do not have an Atola Insight Forensic and would like to place an order, this can be done directly via Atola Technology, or from a distributor near you:
http://atola.com/wheretobuy/
We still have an upgrade program for owners of old Atola Insight v3.x. Please contact our Atola Technology sales to receive more specific information:
The post Atola Insight Forensic 4.6 – Scripting appeared first on Official Atola Technology Blog.