Imaging is a time-consuming part of the evidence acquisition process, especially when dealing with damaged drives.
Even though Atola Insight Forensic is the fastest forensic imaging tool in the world (there is literally no penalty on a drive speed when you image it with Insight!), we want to help expedite forensic process even further. That is why our team of engineers has developed the artifact search feature, which allows analysis of data from an evidence device during imaging.
Artifacts settings
1. Go to Imaging category of the left-side menu
2. Click Create new session link and select the target device
3. In Preset line click Show settings link
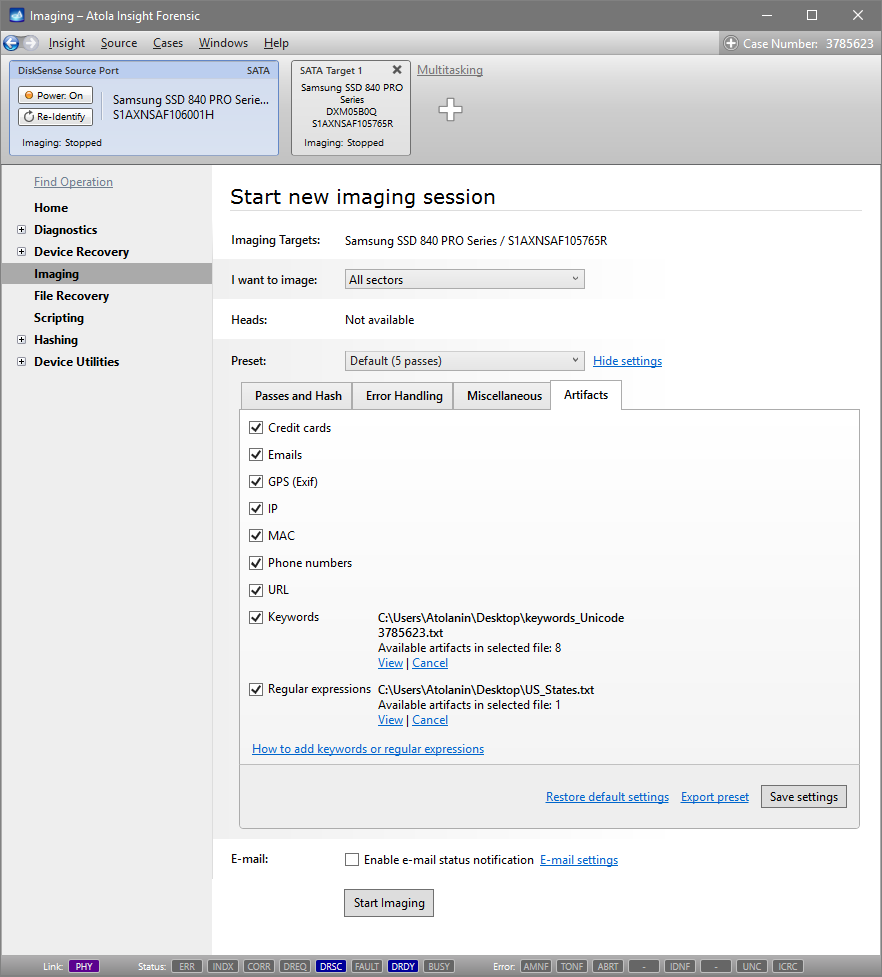
4. Open the Artifacts tab.
![]()
In this tab it is possible to view, select or deselect the artifacts you want to be searched in the course of imaging.
For each of these artifacts we have not only applied well-known algorithms including the Luhn formula used to validate credit card numbers, but also applied our own smart filters to eliminate false results (e.g. if there are two slashes near the number that has preliminarily been identified as a credit card number, that will eliminate it from the search results, as it is likely to be a part of a URL).
Keywords and regular expressions can be added to the search parameters in a txt file with one artifact per line. Click the View link next to Keywords category in Artifacts tab before imaging and make sure the keywords are displayed correctly. Keyword encoding can be adjusted to Unicode, Unicode (UTF-8), Unicode (Big-Endian) or US-ASCII.
![]()
A few of the artifacts are selected by default, namely: GPS, MAC, Phone numbers, URL. You can adjust these default settings and click Save settings button. This will affect all future imaging sessions (including those on new source drives) unless you re-adjust the settings or restore the default settings by clicking the corresponding link. The paths to the files with keywords and regular expressions will also remain saved, although should any changes by made to the txt files in the saved directory, the changes will be uploaded at the start of each imaging session.
NB. It is advisable that no more than 4 artifacts are selected at a time, otherwise imaging will slow down considerably. Also, keywords consisting of less than 4 symbols or regular expressions consisting of less than 6 symbols; large number of keywords (more than 2000) or regular expressions (more than 10) may also slow down imaging process. This is due to the large number of results such search parameters are capable of producing.
Once you have ticked the boxes next to the artifacts you would like to be searched for, click Start Imaging button.
Browsing through the artifacts in the course of imaging
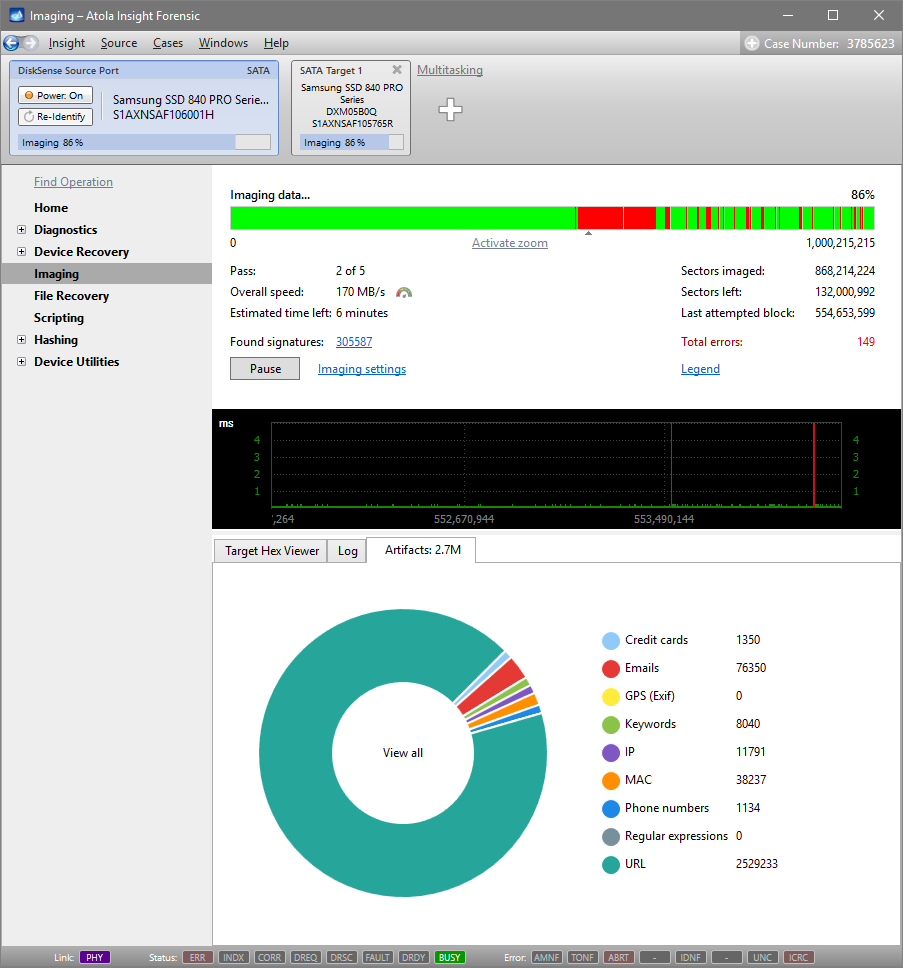
Once imaging has begun, go to the Artifacts tab in the bottom part of Insight window and watch the selected artifacts being found: the numbers of artifacts and the corresponding diagram change on the go.
To see the artifacts in a list, press on any of the categories or the diagram.
![]()
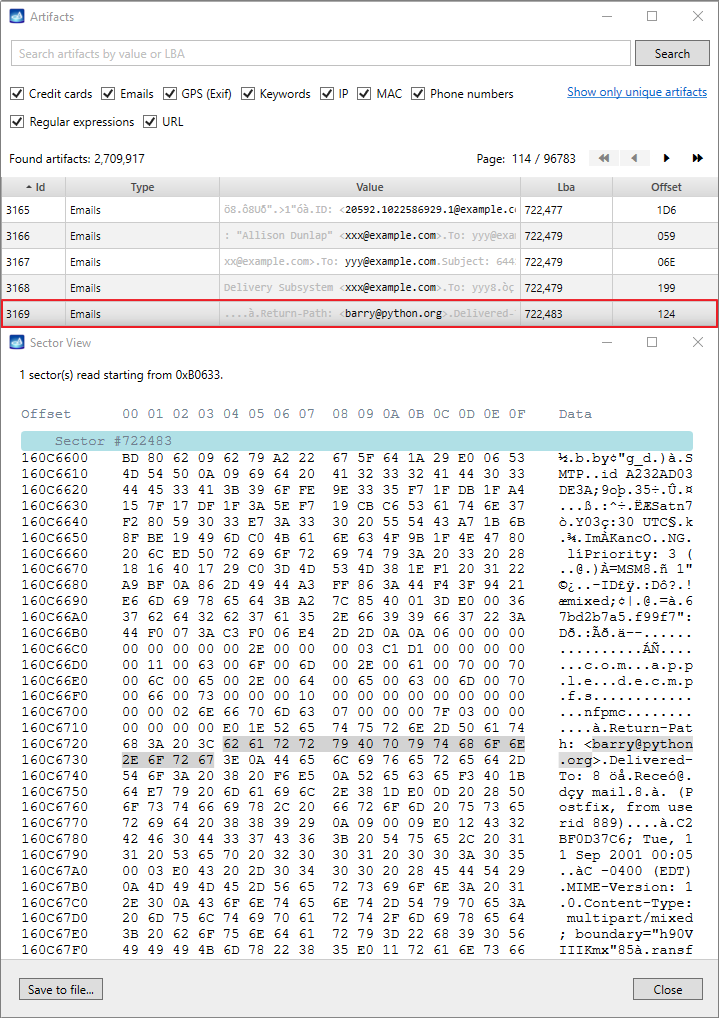
In the table, each artifact is assigned an Id number, each found Value is shown in the context (including 20 bytes before and 20 bytes after the artifact in grey color), the LBA and the offset are also displayed in the table to help locate the artifact.
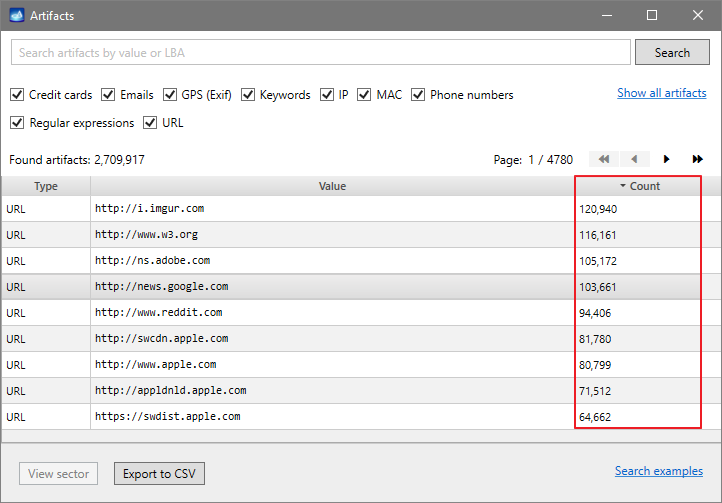
There are many options to help find, sort, filter and view the artifacts: it is possible to view one or a few categories of artifacts in one list, use the Search bar to find a specific value (search examples are provided in the bottom right corner of the window), filter results for unique values by clicking the Show unique artifacts link.
![]()
The latter option is quite valuable as it helps identify the values most frequently occurring on the drive: to sort the results click Count in the table header.
![]()
To promptly find the sector where an artifact is located, you can double click the artifact you would like to examine more thoroughly.
![]()
Exporting artifacts
Export to CSV button is disabled during imaging. You can wait until imaging is completed or pause it, make an export and restart imaging, should it be necessary to start analyzing the current artifact search output with an external tool:
1. Pause imaging.
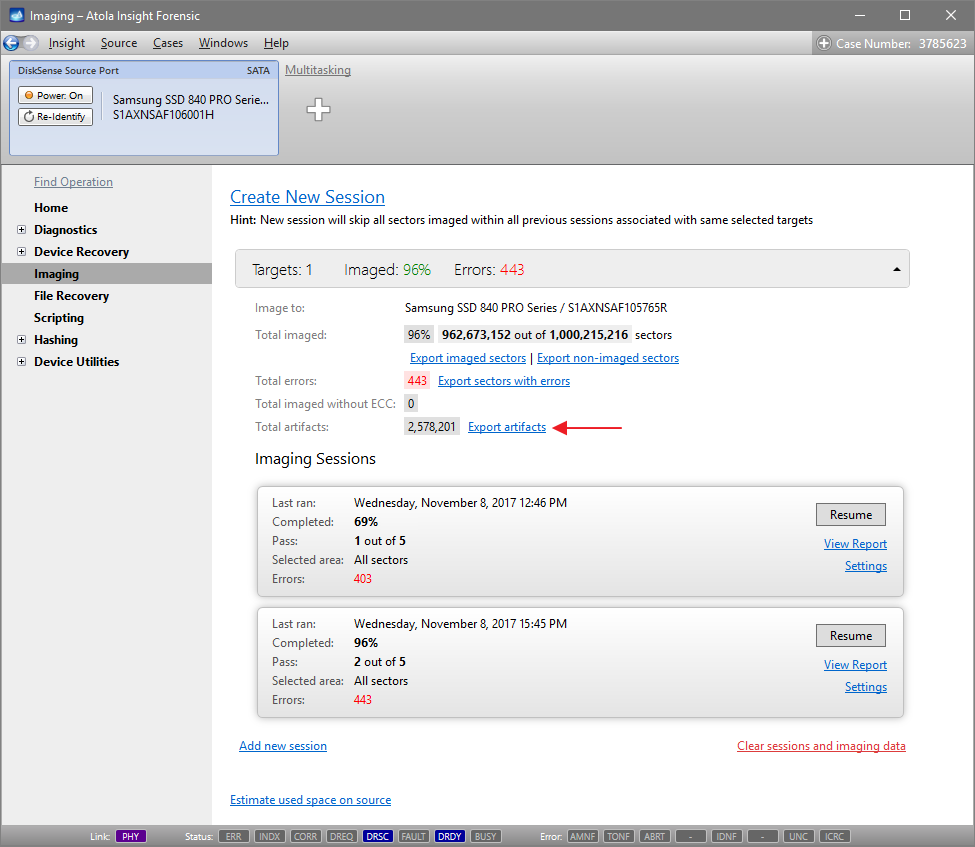
2. In the Imaging results page click on Artifacts link.
3. In the Artifacts page you can select the artifacts you would like to be exported (e.g. one or multiple artifact categories, unique artifacts or only those fitting certain search criteria), and then click Export to CSV file button.
4. Select the path for the file and click Export
5. Once the export is completed (which normally takes no longer than a few seconds), restart imaging.
There is Export artifact link now in the Imaging category of Insight’s menu. If the source drive was imaged in multiple sessions, and artifact lists were created during different imaging sessions, by clicking this link you can download a merged list of artifacts from multiple imaging sessions.
![]()
The post Artifacts: Image & analyze on the fly appeared first on Official Atola Technology Blog.